General Overview:
The new My Custom Segments section allows anyone who is logged in with a user account to create and save their own custom segments. Custom segments provide another level of customization, allowing you to create the perfect segment that best meets your needs. When you create a custom segment, you are creating a virtual segment using in and out points of the video. These segments do not alter the original video and are not downloadable. Segments that are created are visible on the segments tab of any video they were originally created from, at the bottom of the segments tab.
All custom segments are stored in my custom segments and can be organized into folders. Every user account starts out with an Unassigned folder by default. This folder cannot be edited or deleted, unlike other folders you may create. Custom Segments are added to the unassigned folder by default. They can be organized into other folders within the My Custom Segments section.
 Custom Segments Can Be Created From: Custom Segments Can Be Created From:
- Video (Full Titles and Segments)
- Audio
- Custom Content
- Feature Films (Canadian Customers who subscribe ONLY)
Custom Segments Cannot Be Created From:
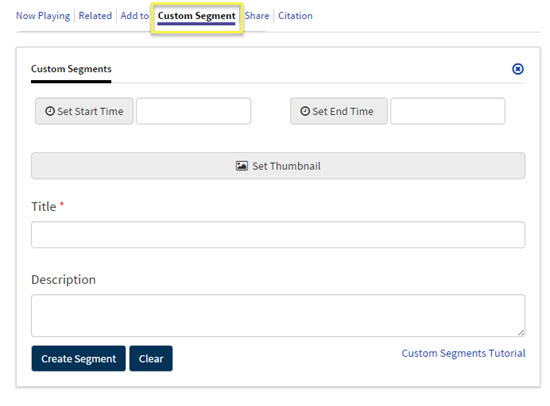
Creating Custom Segments:
Custom Segments can be created on the view media page using two different methods. Follow the steps in the Custom Segment help article to get started.
If you do not see the Custom Segment page tool, please refer to this article on setting user preferences to verify that you have the Custom Segment page tool enabled.
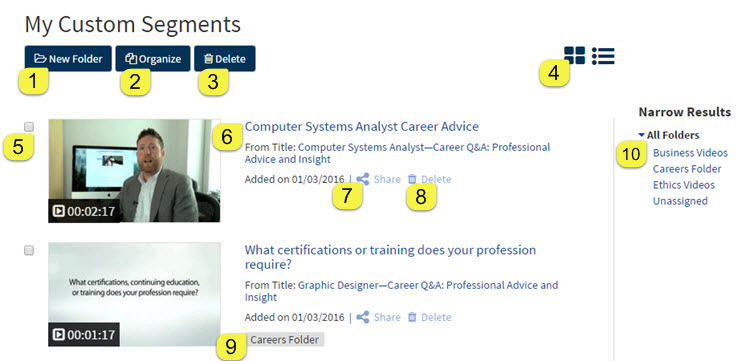
The My Custom Segments section contains the following features and functionality:
- New Folder button - Use this button to create new folders that will be accessible in any section.
- Organize button - Only shows up if you have content to organize. Use this button in conjunction with the check boxes to the left of every item to move segments from one folder to another.
- Delete button - Use this button to delete segments. The delete button only works in conjunction with the check boxes to the left of the thumbnail.
- Grid / List view - Use these buttons to toggle between grid and list views. The default view is grid, but you can click on the list icon to switch to a list/table formatted view.
- Check box - Use these to delete favorites. Multiple favorites can be selected and deleted at one time. You will be prompted to confirm this action before anything is deleted.
- Segment Name - Use this link to view the segment from the appropriate media viewer page on the platform.
- Share - Clicking on Share will open a new section below the segment with the direct URL back to this segment media viewer page. This is an authenticated link that will require someone to login before they can view the content. It is possible that other people may not have the same content in their accounts and therefore will not be able to view everything shared.
- Delete - Clicking on Delete will allow you to delete a segment. You will be prompted to confirm that you really want to perform this action.
- Folders - Once content has been organized into folders, the folder name will be displayed next to each item.
- Narrow Results - Folder level filters that allow for easy filtering of content stored in any of your folders. Clicking on a folder item will display only content stored in that folder.
|